Jupyter Notebook Tutorial
What is Jupyter Notebook?
Jupyter Notebook is an interactive web-based environment for writing and running code, primarily used for data analysis, scientific computing, and machine learning. It allows you to:
- Write and execute code in small chunks (cells)
- See results immediately after each code execution
- Mix code with text, images, and visualizations
- Share your work easily with others
Installation
1Install Anaconda (Recommended for Beginners)
Anaconda includes Jupyter Notebook and many useful Python packages.
- Go to
https://www.anaconda.com/download - Download the installer for your operating system (Windows, Mac, or Linux)
- Run the installer and follow the installation wizard
- Accept the default settings
2Alternative: Install with pip
If you already have Python installed, you can install Jupyter using pip:
🚀 Launching Jupyter Notebook
1Launch from Anaconda Navigator
Open Anaconda Navigator and click the "Launch" button under Jupyter Notebook.

2Launch from Command Line/Terminal
Open your terminal (or Anaconda Prompt on Windows) and type:
This will open Jupyter in your default web browser.
cd command to change directories.
🖥️ The Jupyter Interface
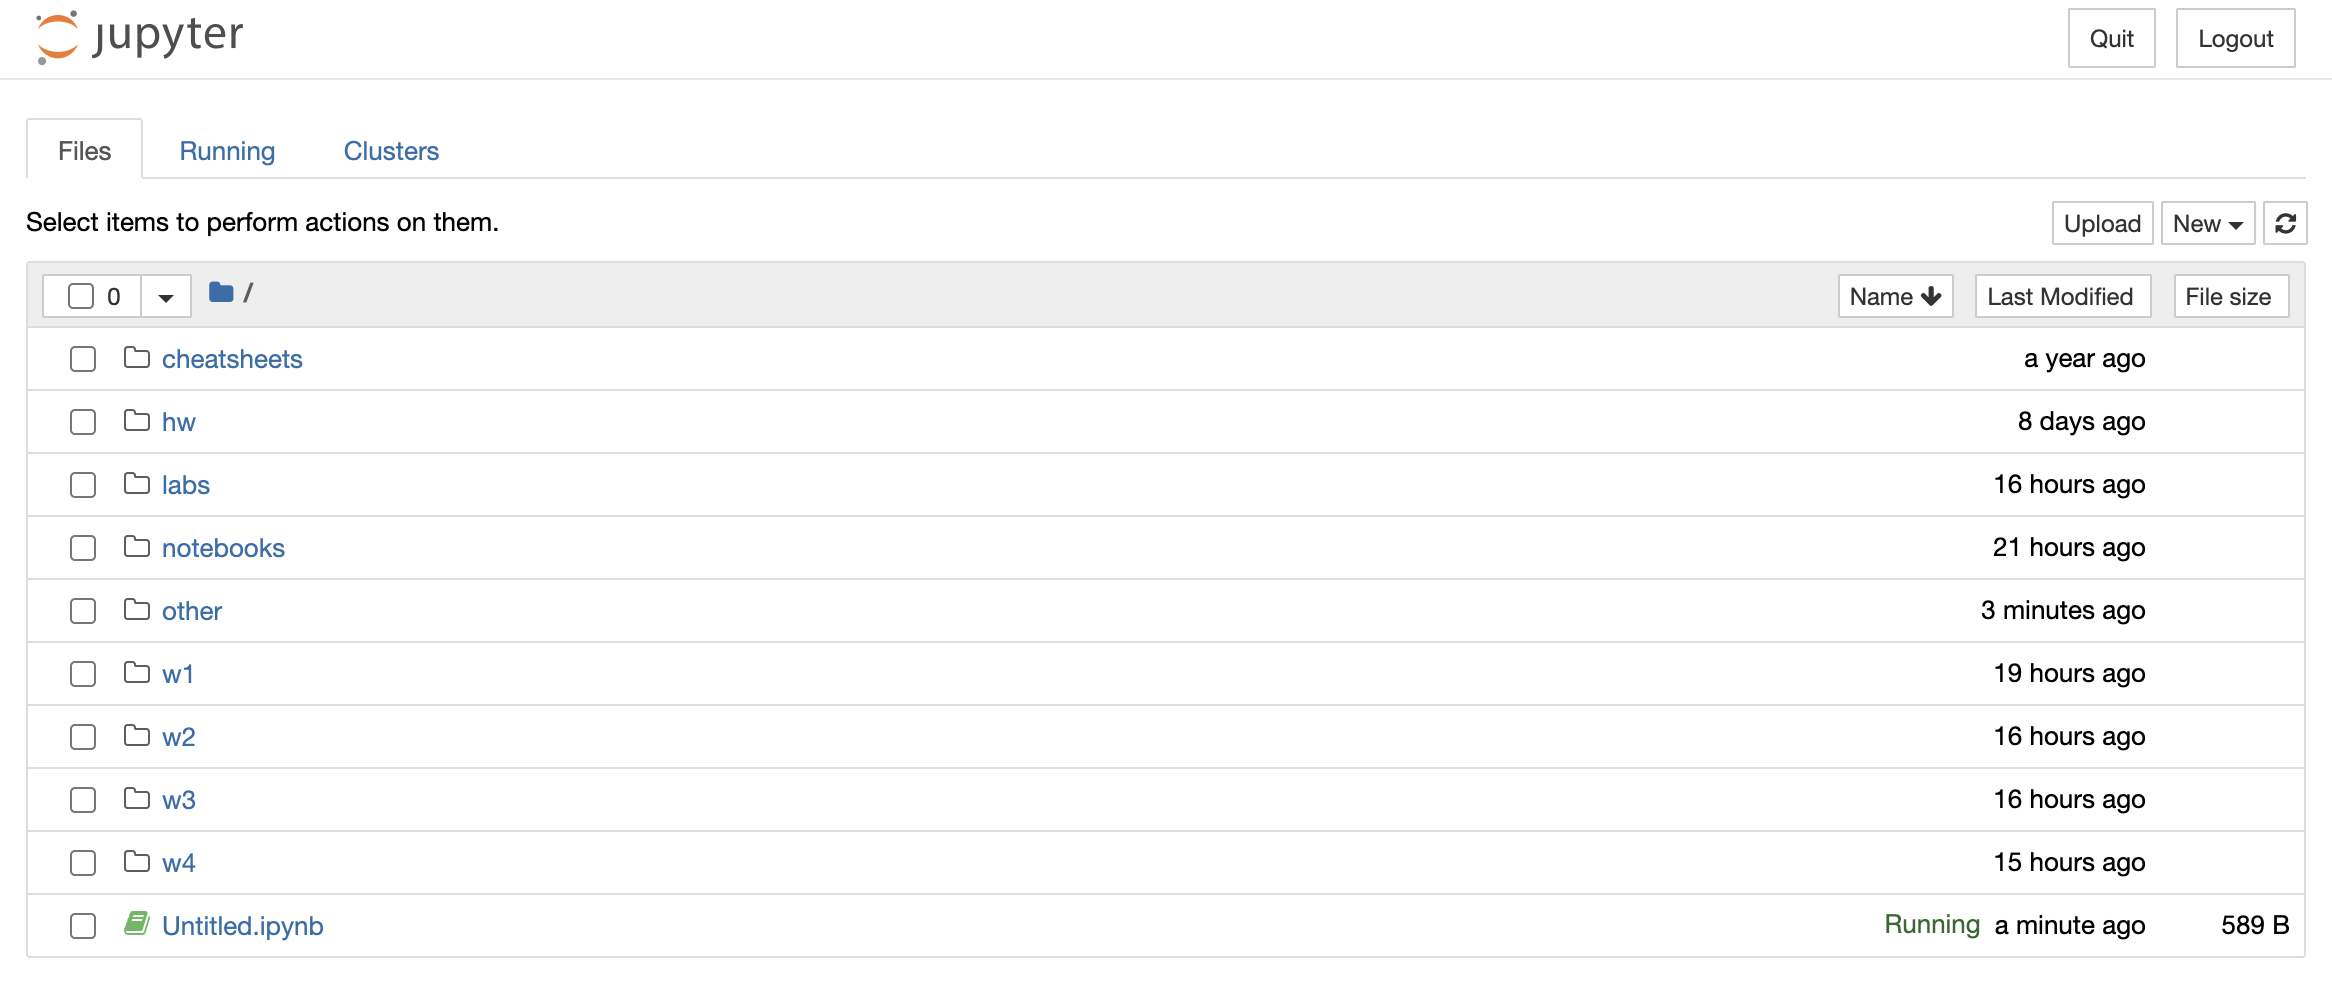
The dashboard shows:
- Files tab: Browse your computer's files
- Running tab: See currently open notebooks
- New button: Create new notebooks or files
📝 Creating Your First Notebook
1Create a New Notebook
- Click the "New" button in the top right
- Select "Python 3" (or your preferred kernel)
- A new notebook will open in a new browser tab
2Rename Your Notebook
Click on "Untitled" at the top and type a new name, then press Enter.

🔲 Understanding Cells
Notebooks are made up of cells. There are two main types:
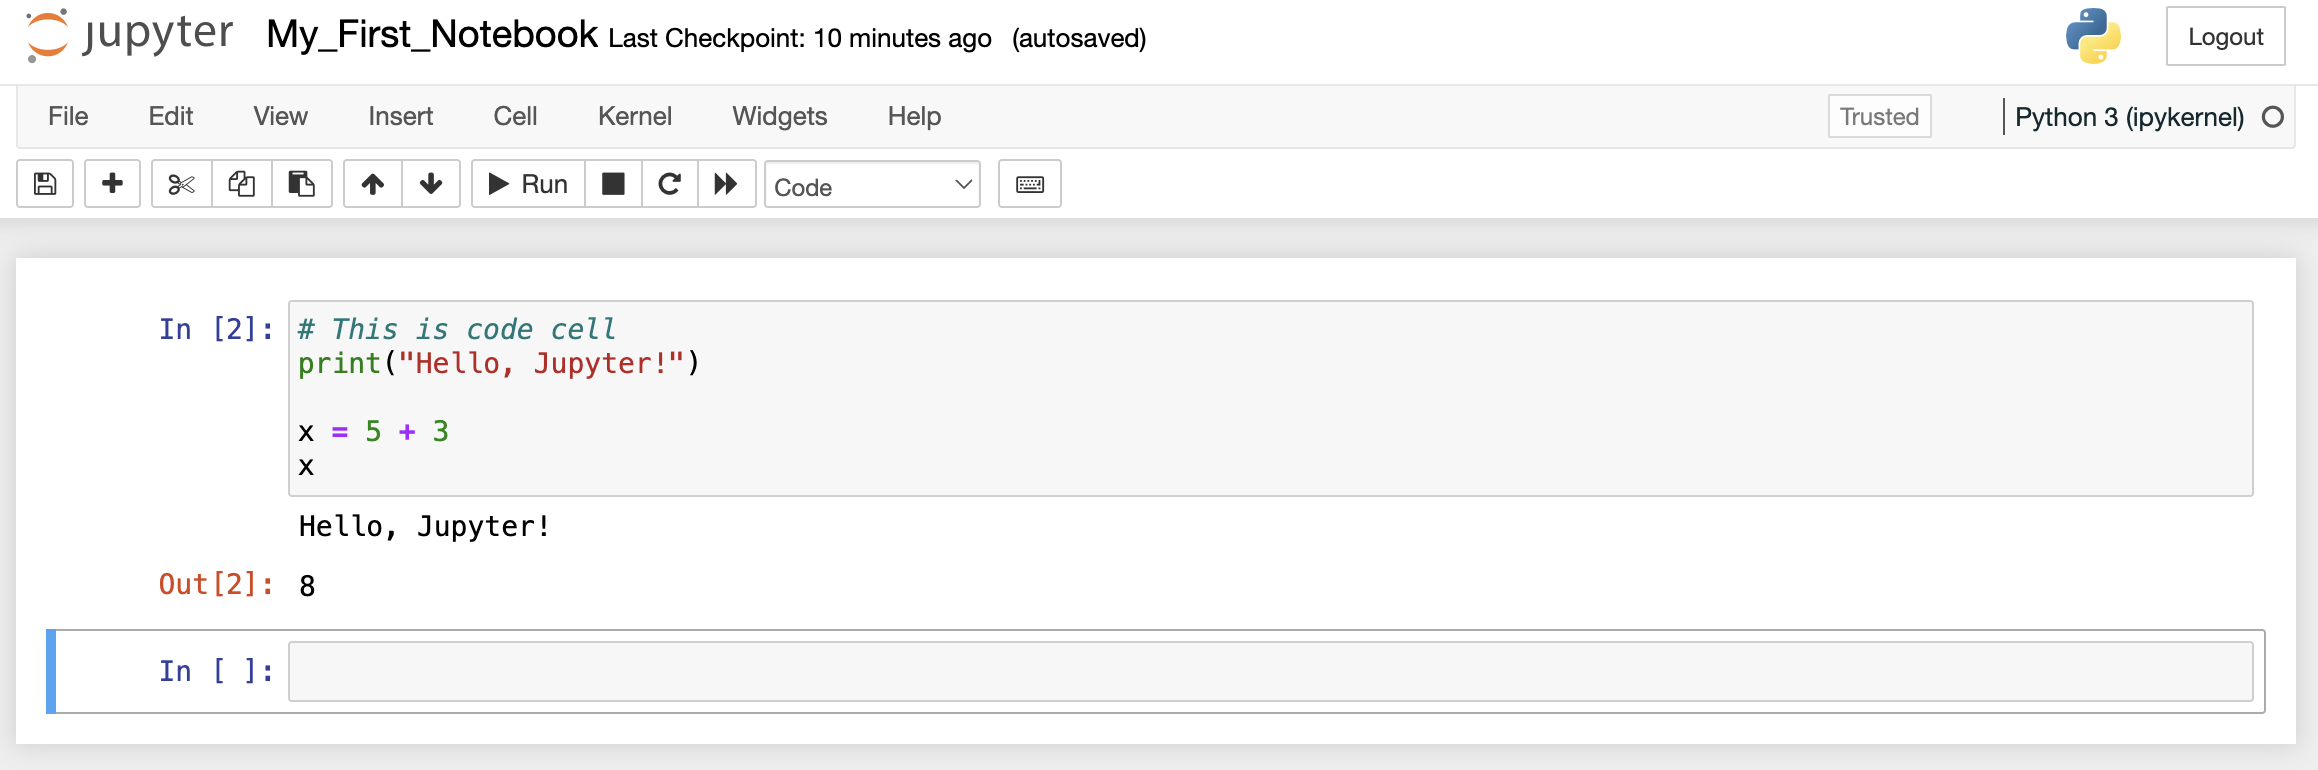
1. Code Cells
Used for writing and executing Python code.
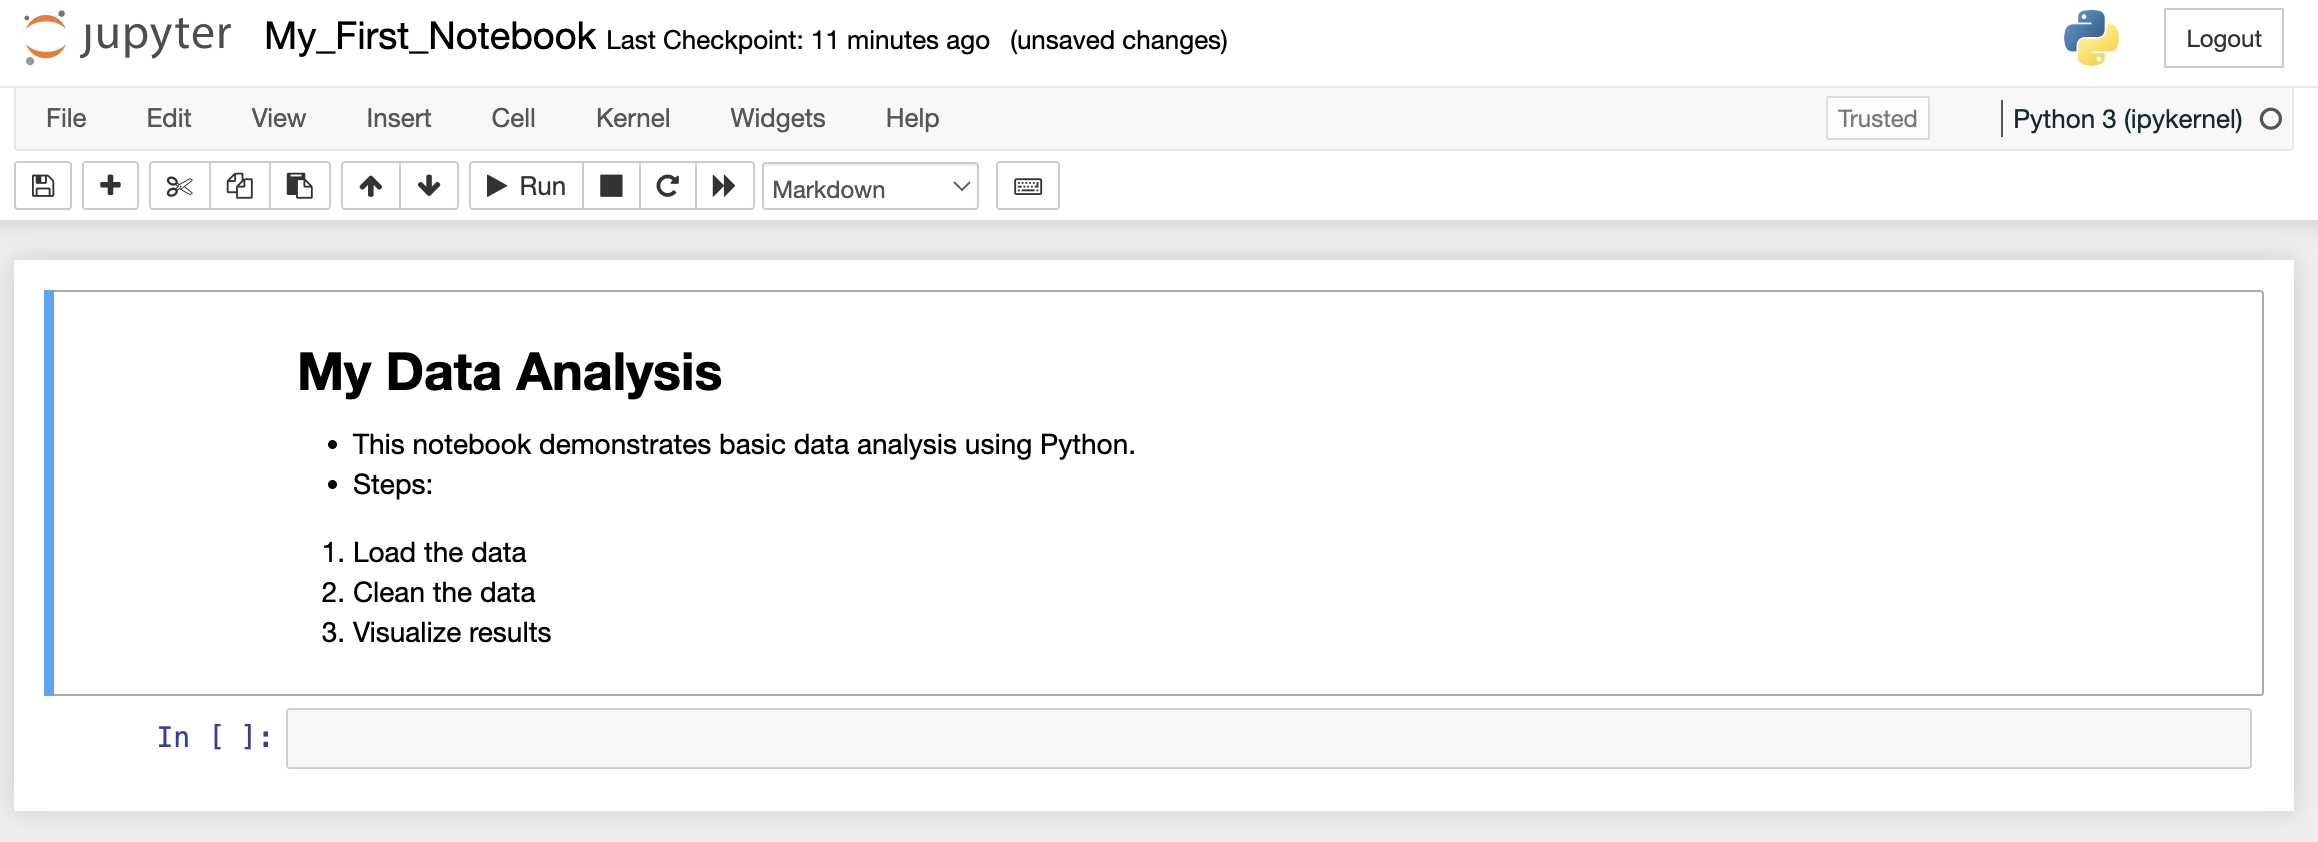
2. Markdown Cells
Used for writing formatted text, explanations, and documentation.
▶️ Running Cells
Three Ways to Run a Cell:
- Shift + Enter: Run cell and move to the next cell
- Ctrl + Enter: Run cell and stay on the same cell
- Alt + Enter: Run cell and insert a new cell below
⌨️ Essential Keyboard Shortcuts
Jupyter has two modes:
Edit Mode (Green border around cell)
You're typing inside a cell. Press Esc to exit.
Command Mode (Blue border around cell)
You're navigating between cells. Press Enter to edit a cell.
| Shortcut | Action |
|---|---|
| Shift + Enter | Run cell and select below |
| Ctrl + Enter | Run cell |
| A (command mode) | Insert cell above |
| B (command mode) | Insert cell below |
| D D (press D twice) | Delete selected cell |
| M (command mode) | Change to markdown cell |
| Y (command mode) | Change to code cell |
| Ctrl + S | Save notebook |
| H (command mode) | Show all keyboard shortcuts |
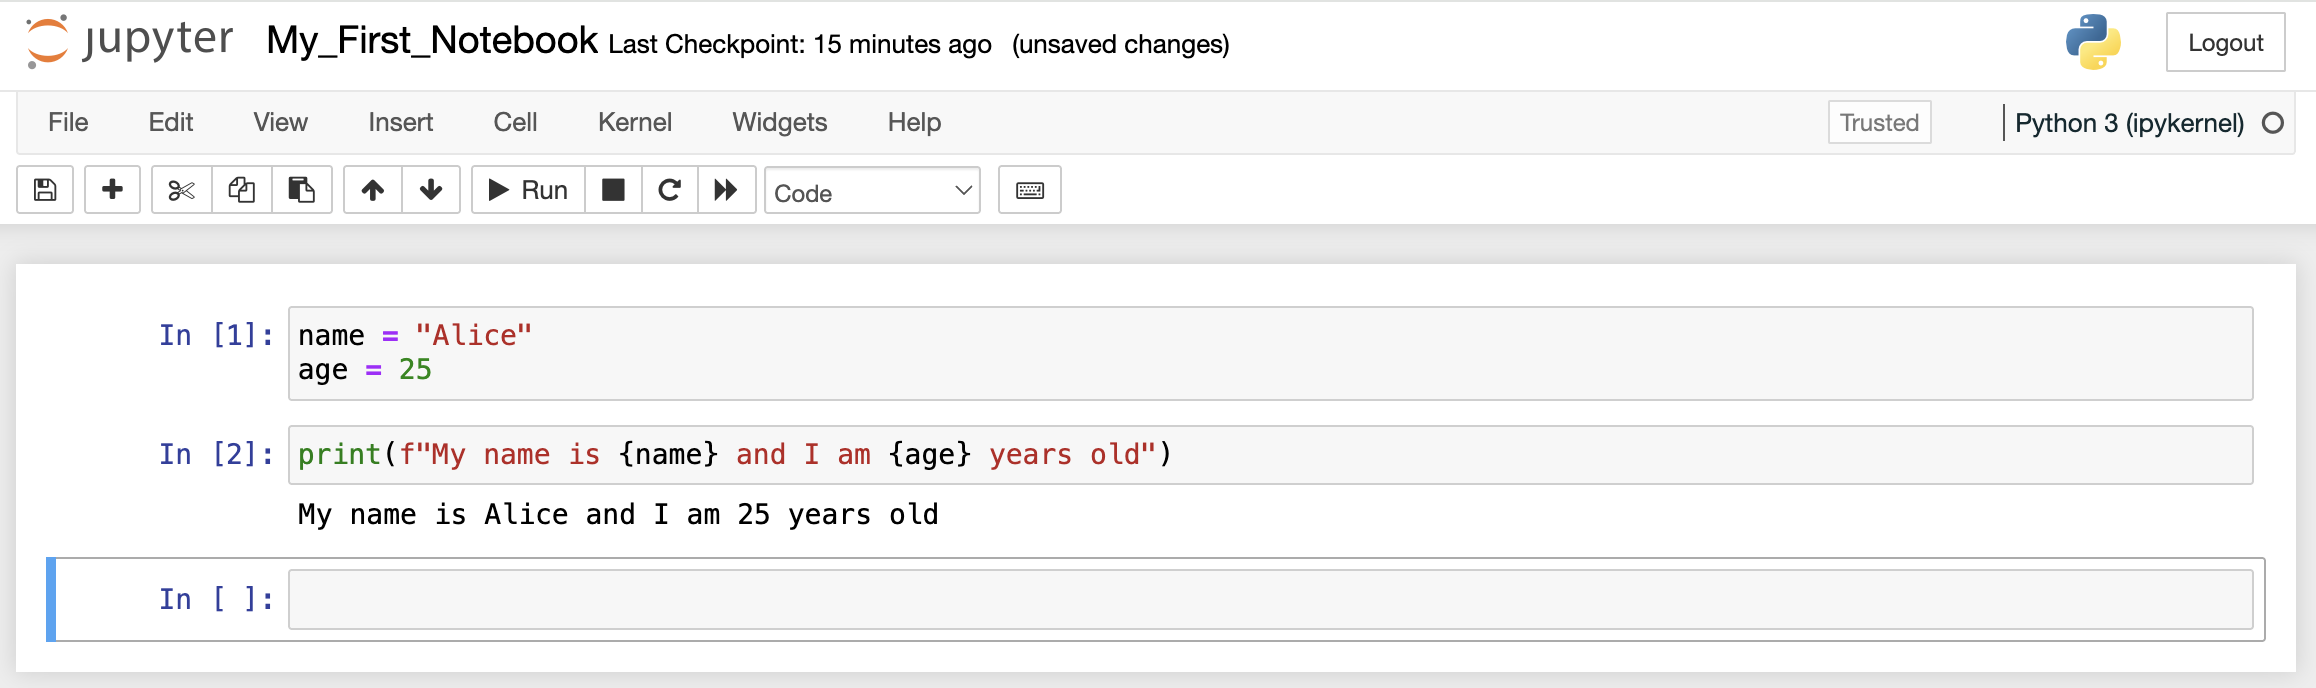
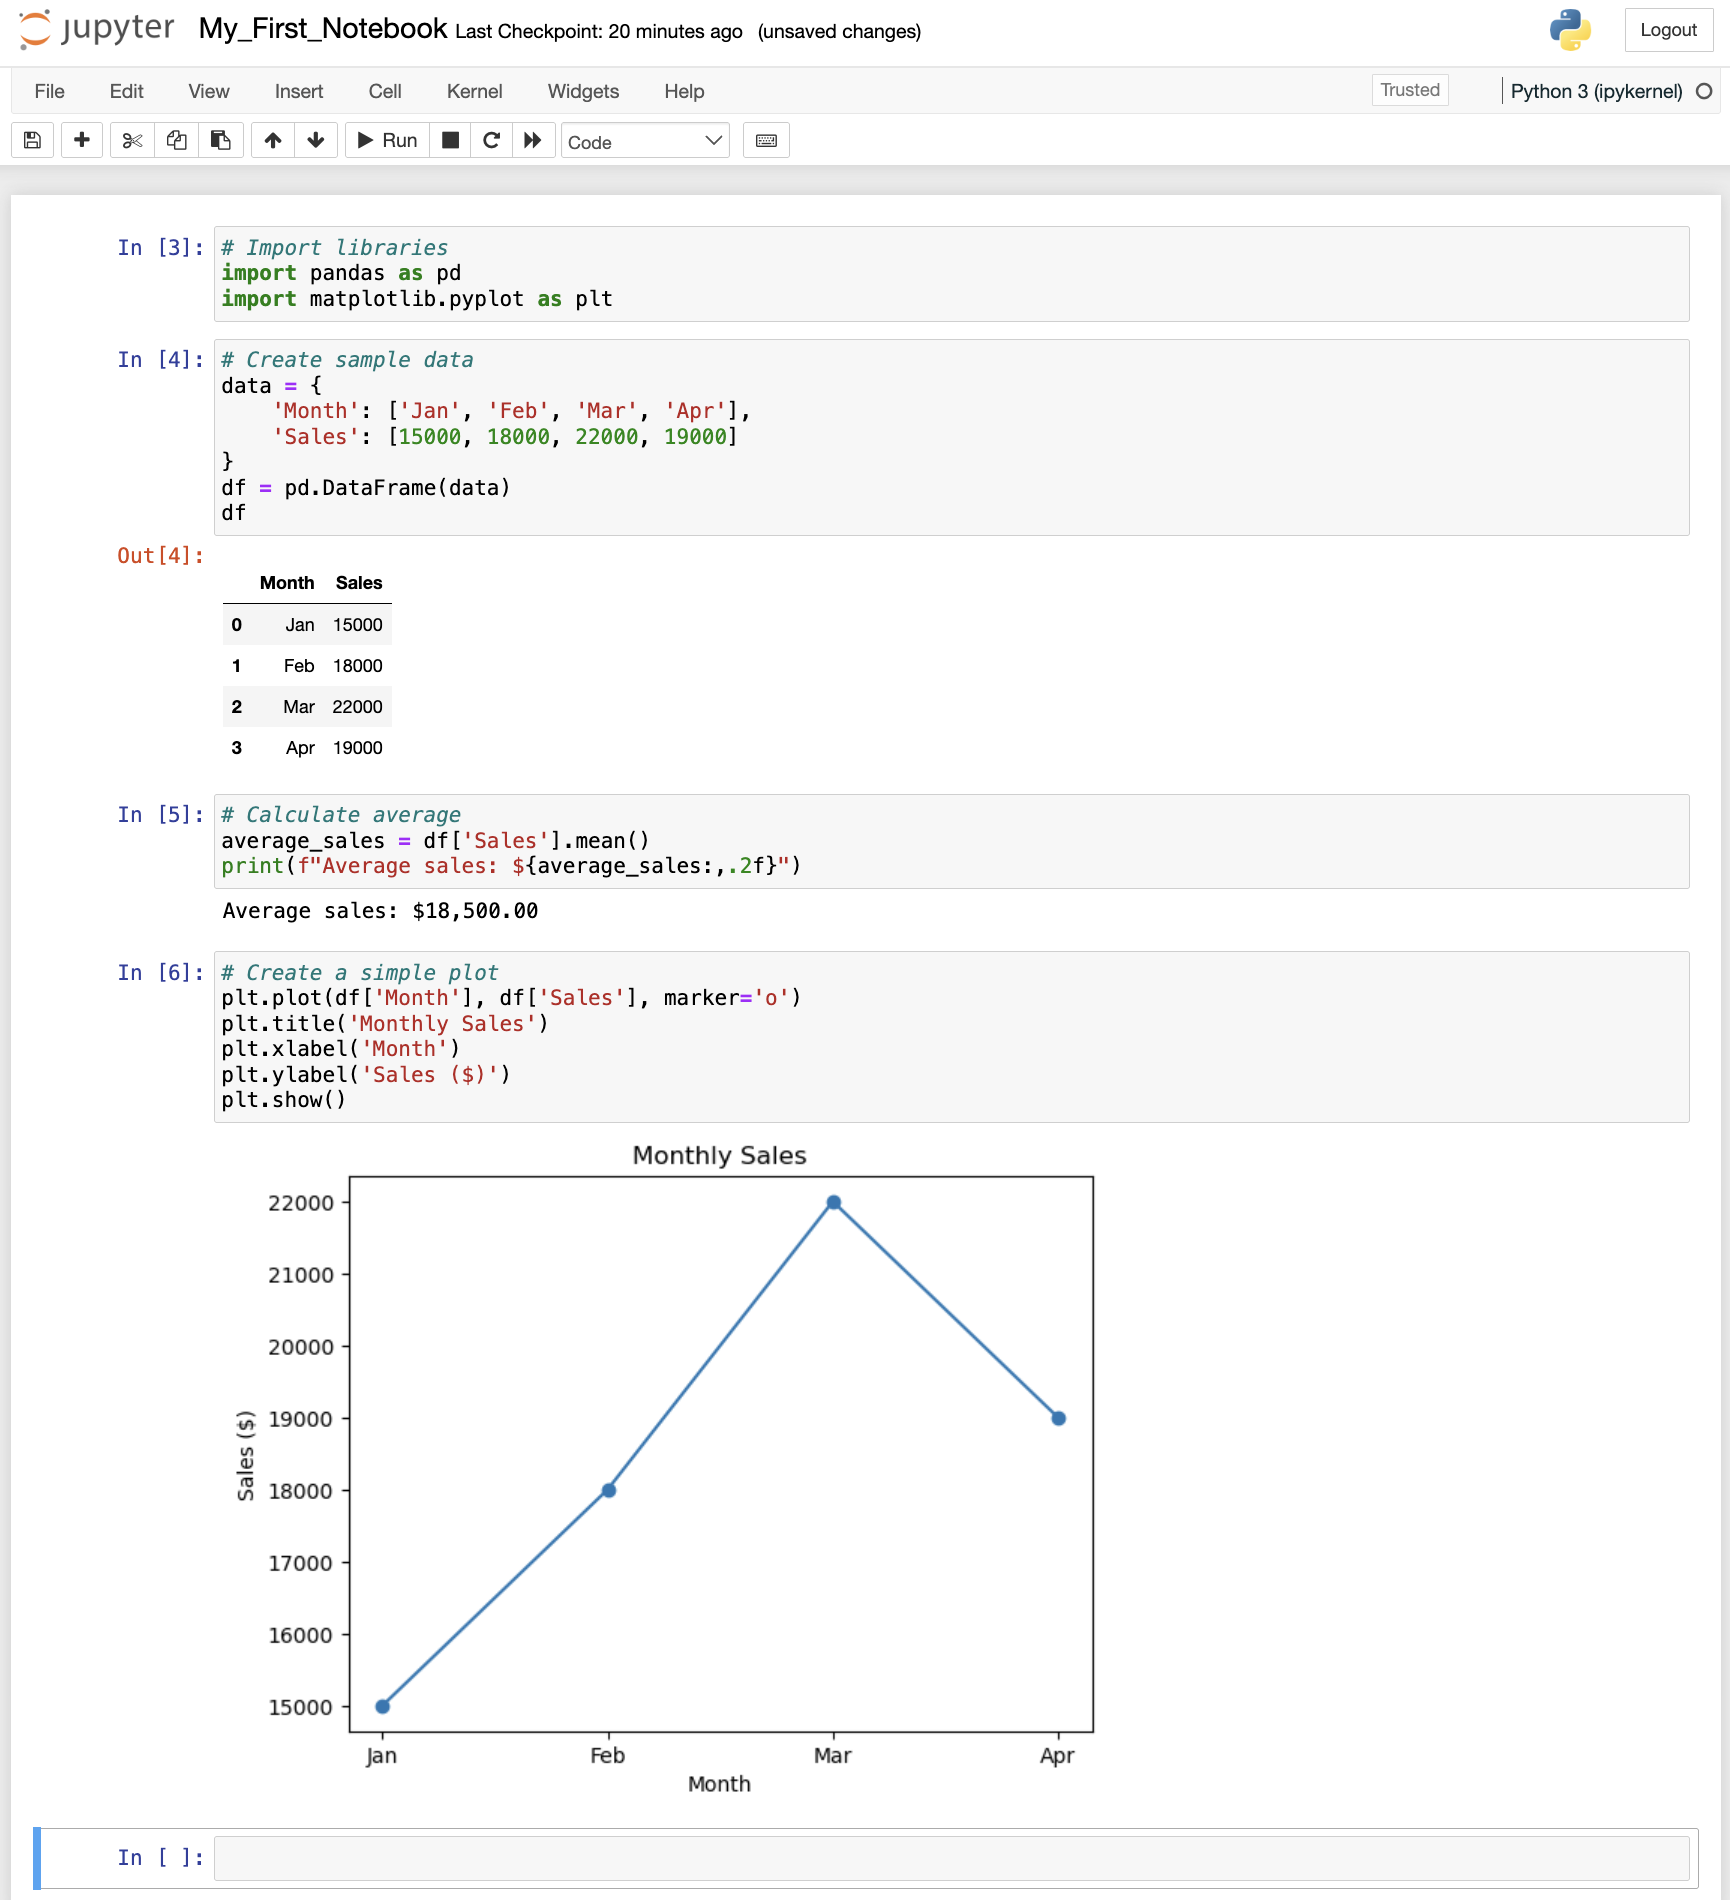
📊 Practical Example
✨ Advanced Features
Magic Commands
Special commands that start with %
%matplotlib inline
%pwd # Print working directory
Tab Completion
Press Tab to autocomplete variable names and see available methods.
# Shows: head(), hist(), etc.
Help & Documentation
Add ? after a function to see its documentation.
# Shows print function docs
Shell Commands
Run system commands with !
!ls # List files
!pwd # Print directory
💾 Saving and Sharing
1Auto-save
Jupyter auto-saves your work periodically. You'll see "Last Checkpoint" at the top.
2Manual Save
Press Ctrl + S or click the save icon.
3Export Formats
Go to File → Download as to export your notebook:
- HTML: Share as a webpage
- PDF: Print or share as document
- Python (.py): Extract just the code
- Markdown: Plain text with formatting
🎯 Best Practices
- Use markdown cells to explain what your code does
- Break code into small, logical cells
- Use descriptive variable names
- Add comments in your code
- Run cells from top to bottom when starting
- Restart kernel if variables get confusing: Kernel → Restart
- Clear output regularly: Cell → All Output → Clear
- Save frequently!
- If stuck, restart the kernel and run all cells
- Check cell numbers - they show execution order
- Use
print()statements to debug - Read error messages carefully - they tell you what went wrong
🚨 Common Issues & Solutions
| Problem | Solution |
|---|---|
| Cell shows [*] and won't finish | Interrupt the kernel: Kernel → Interrupt |
| Variables not found | Run previous cells that define those variables |
| Package not found | Install it: !pip install package_name |
| Notebook won't open | Check if Jupyter is running, restart the server |
| Changes not saving | Check "Last Checkpoint" time, manually save |
🎓 Next Steps
Now that you know the basics, try these:
- Practice: Create a notebook and experiment with Python code
- Learn Libraries: Explore pandas, numpy, matplotlib
- Try Projects: Analyze a dataset, create visualizations
- Explore Extensions: Install Jupyter extensions for more features
- JupyterLab: Try the next-generation interface with
jupyter lab
📚 Additional Resources
- Official Documentation: jupyter.org/documentation
- Jupyter Shortcuts: Press H in command mode
- Example Notebooks: github.com/jupyter/jupyter/wiki
- Data Science Tutorials: kaggle.com/learn
🎉 You're Ready to Go!
Start experimenting with Jupyter Notebook and have fun coding!